Monday, February 11, 2013

Project Life 2013 - Week 5

Week 5, a transition between the month of January
and February, so I've include my clear, month divider 
between the two pages. I have yet to do my monthly
summary yet, but will post it when I do.

The full week's spread. Liking this color combo as well. Slowly getting
used to the limited selection that the Cherry Edition is offering me. I
really wished I had held off in my ordering of this years kit, as newer,
better choices are now available, closer to my style and liking, but
this is what I have for the year, and I will adapt, and probably start
liking it at some point....I'm hoping anyways.

This week had hardly any photo's to share, as 4 of the days I was
out of it with a migraine, and feeling rather crappy. So lots and
lots of journaling for the week. I do like the way, that, by using the
same journaling card all the through the middle sections looks.

As the week came to a close, we had more stories to share, and
as I was finally feeling better, managed to take enough photos
to help tell these stories.

December Days - Day 26

This is the last posting for my December Days as another Christmas season has come to an end. Now I can focus on actually putting together my physical December Daily Album.

Today is Boxing Day, and like last year, we went shopping, but unlike last year, where I included our shopping adventure in my album, I decided to do a focus on all the food, those that have become traditional, and allow us to look back in the future to see what has stayed the same and what, if any, have changed.

Our typical, traditional, food assortment for Christmas Eve, and then
lots of nibbling on the same foods through New Year's Day.
Always make Linda's fruit salad each holiday season,  it's just as important
as all the other holiday fixings. A must on our table.
The turkey, perfectly roast, well, not this year, it was a bit dry, but the
skin is my favorite part anyways, so perfectly crunchy for me.

Then the stock is made, and ready for the morning, so I can get a batch
of turkey soup ready for dinner to go along with our turkey sandwiches.
a great way to end our shopping day here on Boxing Day.


Project Life - Week 4

Week 4, lots of photos taken this week, lots of little stories to share.

This weeks full view, did some stamping on the journaling
cards, and liking the yellow, even though I am not a fan
of the yellow, it works off the colors in the photos.

A close up of the left hand side. Did some stamping, and added a bit
of my own handwriting, something I was encouraged to do by an IG
friend. Never have liked my handwriting, so this is a big deal to include
 
Did some journaling directly on some of my photos, and then
just used the big 4 x 6 cards to share most of the week's events.
Lots of photos again this week. 


Project Life - Week 3

Week three, my favorite in the album to date, I just
love the flow, the red and the way the circle cards
work in a line. This will be a color combo I use again.

The full view of the spread for the week.

The left side, still loving those circle journaling cards, and how
well placing the date on them worked for this week.

The right side, with lots of photos for the week, and
a good amount of journaling as well. I really like this red.


Project Life 2013 - Week 2

Week two of Project Life. Getting used to the new
color choices of the Cherry Edition, as compared
to the colors I loved using in last year's album,
which were from the Clementine Edition.

Loving the flow of this week.

A close up of the journaling and photos on the left hand side.
(if you click on the photo, you can bring it up in a seperate window
and then make it larger to easily read the journaling)

Not very many photos from this week, so used a lot of journaling cards
to fill up the spaces and to tell more of our stories.

Project Life 2013 - Week 1

This first week of January, is a short week, but I 
still wanted my Project Life weeks to run from 
Sunday thru Saturday, so I started on the 1st which
was a Tuesday and went to the 5th, the Saturday.

A look at the whole week spread.

A close up look at the left hand side, and all the photos are from our
outing on New Years up into the snow covered mountain range
in Mission with Michelle and Jason so do some shooting.

A close up look at the right hand side, with some photos to document
what consisted of our week, and a big 6x12 side with 2013 as the highlight.


Project Life 2013 - Title Page

This first page of my album, the title page, it pretty much put together
as the insert card suggested that came with the Cherry Edition's core
kit. I added dimension with some Making Memories butterflies, which
I adhered to the outside of my page protector. I only changed it up a
little bit with the addition of one photo, taken New Years Day.
I added some little details to a lot of the cards, just to personalize
it for us. I hope you keep coming back to the blog to see how
the album takes shape, and to see what life is like for us.

As I did last year, I am going to document our year with weekly entries
into my Project Life Album. This year, I chose the Cherry Edition, and
for those of you not familiar with the concept of Project Life, please check
out the link below that will bring you to Becky Higgins blog and website.

http://www.beckyhiggins.com/


Beach Mini Album - Finished Pages

Here's a page by page look at the finished album. I hope
you enjoy looking at it as much as I did making it. Cheers!

You can see how inking the edges of each letter, helps it stand out
from the one below it, giving it a bit more dimension. And I just love
adding tons of ribbons to my rings on a mini album. 

A closer look at the front of the B. The title of the album is
So Cal Beach Visits. We visited 8 different beaches on our
last trip down, thanks to our great friend Mike. He lives in Long Beach,
we then went south to Seal, Huntington, Newport and Laguna Beaches.
Then north, to Santa Monica, Malibu, then on our way back south, a
detour into Venice Beach. So much fun seeing all the different beaches,
and piers, or shops that distinguish one from another. 

The inside with the first transparency insert. 

The back side of the transparency and the front of the E.

The insert has a bit of side detail to it. Unfortunately, I don't remember
which company made the transparencies I used in this album, Sorry friends.

Backside of the E and the rest of the album.

A close up of the backside of the E.

The front side of the A.  A close up look.

The next pages,  a full view. And another transparency overlay
to add much needed space for the journaling. I used mini letter
stickers for this. And had to mix sizes once I got down in the
letter availability. Why is there never enough of the letters
you need????

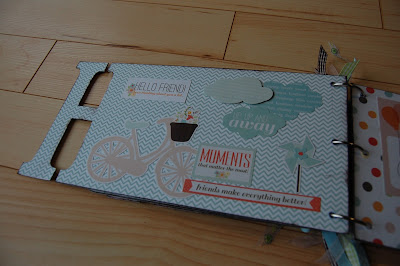
The backside of the A. I just had fun using the sticker sheet
from the Sweetdays line from Echo Park Paper Co. The few word
stickers are from the Authentic Line of word stickers.

A close up of the front of the transparency overlay.

The back side of the transparency overlay, more stickers used here.

The front side of the letter C. I used some of my favorite photos
from our visit to the three southern beaches we visited.

The backside of the C, I used a variety of elements here, I love
the cloud paper, and although the white letter stickers blended in
to the paper, I felt there was still enough of a contrast to stand out.
This was also a place to add a highlight photo from each of
the beaches listed that we visited this day. More letter stickers
from the Authentic Line of products. I just love their alpha
stickers and word stickers. Awesome color choices too.

The full look at the back of the C and front of the H.

The last transparency overlay, with more mini stickers as the journaling.

The backside of this last transparency, used more of the matching
stickers from this line of paper.
The close up view of some of our favorite memories from the northern
beaches we visited. It was mid October and the temperatures were
still in the low 90's. Oh how I wish I was back there today,

The last full spread of the album, the back of the H, and
the full piece of chipboard with the album. I wasn't going to
use it, but then decided it was extra space to add some
fun details, and a few more pictures
 
The backside of the H, just had fun with the sticker sheet, and played

The last page of the album dedicated to our wonderful friend Mike,
who made all these beach visits possible. Love this guy.

A look at the back side of the completed album

Thank you so much friends, for taking the time to look at my album, and let me share some memories with you all.

Beach Mini Album - Covering the chipboard

I got this Bo Bunny Beach chipboard album on sale at my local
scrapbooking store for only $2 and decided to use it for our
last visit to California, in Oct of 2012 I also had on hand
wonderful, happy pattern paper and stickers from Echo Park
 and the line is called Sweet Day. Perfect for a beach theme

The most challenging part of any chipboard album is getting it
covered, whether with patterned paper, fabric or by just
inking it to get the colors you desire. For me, I have always
loved covering them in paper, love using a line of products
that all go together, so the album flows nicely.

The process begins with lining up the patterned paper,
I try to get a least one side perfectly placed along the edge,
to save me having to cut that side, then  I trace around the
letter and full chipboard piece, making sure to trace it on the
side I want facing up, and that the pattern or design of
the paper will also be in the right direction when adhered.
 
Make sure you cut a piece of patterned paper for both the
front and back of each letter, I like using double sided
paper for this as it will give you one side for each side
of the letter. (make sure you trace it out with the right
side showing that you want, or you will end up with both
sides looking the same. I make a note on each side of the
chipboard, saying front and back, just so I don't confuse
myself or the paper I cut out, Certain letter, will look very
similar when flipped over. A mistake I've made in the past,

Just showing you how I line up the one edge of the letter
to maximize paper usage and to save on cutting one side
of the paper. Also, remember to trace out circles for the
rings, and then you can use a hole punch to get the holes
easier before adhering the paper to the chipboard.

Showing you the backside of the letter C,  and checking
the size I have cut, before the gluing process begins.
Oh, one thing I forgot to mention, is that I cut these
out by hand, with a pair of fine tipped scissors, and  a
paper trimmer for the longer, straight edges. I do not use
an exacto knife, as I find I have less control with one.
Please use whichever method of cutting that works
best for you. I do test run each piece of paper on the
chipboard to make sure I don't have excess overhang.

A look at how the tracing looks after moving the chipboard
piece, and before I start cutting.  This would be where I would
use the paper trimmer for the long straight cut, and then
hand cut the rest of the letter out. This is the front side
of the letter A, and I will once again use the same paper,
but opposite corresponding side for the backside of the A.
 
The back side of the same piece of patterned paper, and
ready to cut out for the back of the A.

As I go along, I line up the letters, to make sure I like
how the pattern papers are looking together, and if need
be make any changes before I actually glue anything
together. Easier to make those changes now, then
after everything is glued together.

When all the paper is cut out to size, now comes the part
that is my least favorite, and that's the gluing. It's messy, and
time consuming, and yet, I find using a glue stick just works
the best, over any double sided tape, as I have tried that
in the past. If you use a spray adhesive, I'm sure that
would work great, I've just never tried it before. And be
generous with the glue, get every little spot, especially all
the edges, and be careful with excess glue getting on the
good side of the paper, as I had a few areas I had to clean
off and it was a bit tricky to do so.  I found that putting
the glue on the chipboard itself, was less messy then if
applying it directly to the paper.

Hopefully you have a brayer, one of the best $15 I have spent
on scrapbooking tools, and it helps press down the paper
nicely, with no ripples or bubbling. Although, please be
careful in your lining up of the paper when laying it onto
the chipboard, as it does get a bit difficult to move if it's
off sided at all. I had more success lining it up from the
side with the holes and working my way down to the
end of the letter. I did have to trim away some excess, but
that is normal when tracing chipboard. 
 
The front sides are all adhered and ready for some sanding and
inking of the edges. I find that by doing this, any overhanging
paper gets worn away with the sandpaper, and the inking, I used
chocolate brown, just helps define each letter in the album,
and gives it a bit more dimension for the one below it,

The back side of the letters had much more color
difference, but that is how I chose to use the paper
it had. If you are using double sided paper, and it's
from the same line, you can mix it up as you feel works
best for your album.


I hope this will help you if you decide to make your own mini chipboard album,  and that you enjoy the process as much as I did. From start to finish, the covering of the chipboard took about an hour, give or take. And although it is a bit of a
hassle, once it is covered, you are on to the fun part of making the album a story to share with loved ones.