Wednesday, November 28, 2012

Potato Soup - Tweaking it til it's right.

I have been making the same potato soup recipe for years now, ever since Tim's Aunt Lois gave me her recipe. And pot after pot, we have enjoyed it's warmth on cold fall and winter nights. But a few months ago, after having my brother in laws homemade version of his own soup, I wanted to make mine a bit richer, a bit more full of flavor, and I think tonight I finally accomplished it.

Not many ingredients to make a great pot of potato soup
from scratch. Easy and so flavorful. If you don't have a leek,
use an onion, and you can substitute milk for the cream.
And bacon is optional, I love bacon, so it's a must for me.

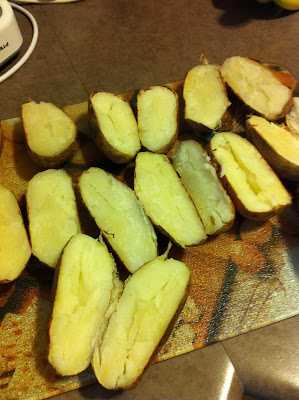
The original recipe calls for just boiling the potatoes, which works
if you are on a time limit, but tonight was the first time I baked
the potatoes and it made a big difference in the flavor.

If this is your first time using leeks, they really need to be
soaked, as they tend to bit gritty with soil deposits, and
just putting them in cold water for about 5 mins will get
them clean, just remember not to pour the bowl out
through a strainer, or the debrise will just be re=depoisted
onto the leeks in the process, I scoop mine out of the
water with a wire Chinese strainer.
 
To help cool off the potatoes quicker, cut in half and let
cool until not too hot to handle. Scoop out all the insides
with a spoon or as I do, use a melon baller.

While I was scooping out the potatoes, I was also browing
the bacon, which I had cut up into pieces for easier browning.

After the bacon had brown, I added about 4 tbsp of
butter, and when it melted, then added the cleaned and
drained leeks, over medium heat, stirring so they don't
burn, until leeks were softened, about 10 minutes.
 
I used a 5lb bag of russet potatoes, and after removing
them from their skins, was left with a full dinner sized
plate of them to go into the pot.
 
I used only a few spices and flavor add ons. Salt and peper,
basil, marjoram and Franks redhot sauce. I add these into
the bacon and leeks before the potatoes, and let mingle
for a few minutes before adding the potatoes.
 
Add the potatoes into the pot, stir with wooden spoon
to completely cover with all the flavors and then using
a potato masher, rough mash the potatoes.

Only mash some of the potatoes, as this will be what helps
to thicken the soup after you add the cream, but leaving some
bigger chucks will allow the soup to have more texture, and
be less like mashed potato soup,

Add the full container of cream, and then re-season to taste.
I will also add celery salt at this time to add a bit more
depth to the flavor. Be very careful to just heat through
and simmer slightly until just thickened, about 15 mins or
so, as if you let it go any longer, it will thicken, and the
cream will evaporate, leaving you with mashed potatoes.
 
I love having this soup with biscuits, to dip, and my
favorites are the country biscuits by Pillsbury.

Dinner is served. Hope you enjoy it as much as I do.


Monday, November 26, 2012

December Daily 2012 - The beginning of the process

In the beginning there is that overwhelming sensation of will I have the time, the desire and wanting to follow through with another project during the busy holidays? I did do my first December Daily album last Christmas, and although I was happy with getting it done, it was a commitment, and did I want that commitment again this year. And as I am also working on my first Project Life album this year, would the two different albums end up just repeating the same stories. After some internal debating with myself, I decided that I would make the albums different, only focusing on one story per day as I did last year with my December Daily and leave my Project Life for the everyday life stories. That being said, I then had to choose what my album would look like, what patterned papers I would use etc...so off to the local scrapbooking store I went. And after walking round and round, I once again decided on using my favorite line of products right now and that is Simple Stories. Love that line, and this years Homemade Christmas line is no disappointment. And they also have 3 sticker sheets that coordinate with the papers this year so bonus.


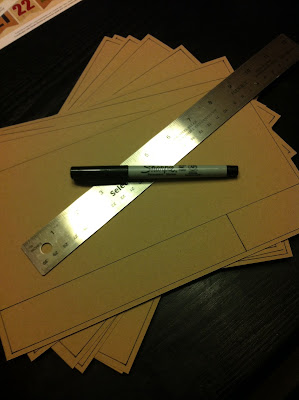
After deciding on my papers, and the size of my album, I cut out my album covers using medium thickness chipboard, and running it through my Cricut. My covers ended up being about 6 1/2 x 10 1/2 inches, and my foundation pages would fit perfectly inside as they are 6 x 10 inches. After cutting my chipboard, I then cut out the pattern papers that I would used to cover both sides of the chipboard. I then attached the paper with a glue stick and used my brayer for a good adhesion.


After getting all the covers dealt with, I moved on to getting my foundation pages cut, and then hand drawing all my borders, and journaling, date squares, similar to the design I used last year, following Ali Edwards digital version. 


After getting all the foundation pages cut and drawn out, it was time to decide on what of the pattern paper cut outs I would use for which days, and then start with adding the date stickers and other things to bring each page together.


And even though I really like all the elements of the Simple Stories line, I just wanted to add a little more bling to my pages, so cut out a whole sheet of stars with my Cricut, on a 8 1/2 x 11 sheet of gold heavy duty cardstock.



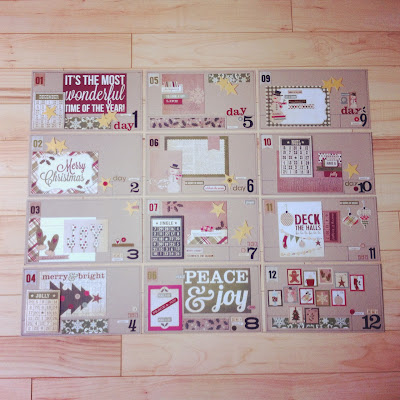
December Daily 2012 - Foundation Pages

These are my foundation pages for my December Daily 2012. I wanted to be able to utilize my Kraft cardstock, so made the inside pages 6 x 10 and therefore got 2 per 12 x 12 pieces of paper. I used my favorite line of paper right now, with coordinating pages of sticker. Simple Stories Homemade Christmas is perfect for telling my story this year, I also used their line last year for my first December Daily album.


Unlike last year, I'm going for super simple this year, just a page for each day, and using the backside of the day before to hold the photos and stories. Last year I used page inserts and some overlays, but want a completely different feel to my album this year. The only thing that I used from last years design was the hand drawn border and bottom section boxed off. I am sure that for now, I will stick with this basic design, but it depends on the stories I end up telling as to how it will look when it's complete. The only thing not in the Simple Stories line that I've used is the gold stars I cut out using my Cricut with a gold cardstock.

Thanks for taking the time to come and check out my December Daily. I hope to see you again as the season comes together in my album and on my pages.

Saturday, November 24, 2012

Project Life - Week 27


This first week of July was a busy one. The one word to best describe it would be explore. We found new places to
go, saw things differently through our photography, and enjoyed the beautiful weather we finally were having.
This week was so full, that I included an extra page insert that holds 4x4 photos, which after some trail and error,
I figured out how to print off of my computer. Sometimes you just have to outsmart technology.

This left hand side is a bit of everything. I love using the number stickers when lots happened during the week, so
that I can use a journaling card with point like entries. This page covers everything from a favorite photo I took, to
Jason's car accident, to work and grocery shopping. And look, I got a pic of Tim smiling. woot woot!!

We went on a day road trip down across the border, and discovered two little heritage towns that
we had no idea were there. And in Ferndale, not only did we explore the old settler site, but there was
also a classic car show going on there as well, so double fun, and lots of photos. 

This is a look at how the back side of the insert and right hand side of the week looks.

This back side of the photo insert was from the second little town we discovered, just south of Bellinghan, WA.
It's called Fairhaven, and we enjoyed walking the quiet streets, taking in the history and beauty all around. I was
in picture taking heaven here, so much to capture on each street, around each corner and alleyway. Oh, and I had
on of the best coffee frappes ever at a coffee/wine bar and eatery called Rustic :) 

This right hand side rounded out our week, mostly journaling cards with s few photos
 that were taken as the week came to an end. I love weeks like this, so full of living life,
instead of just the same daily routines. Love that photography has opened up
 our eyes to more adventures and roadtrips.

Below are the close ups of all the journaling cards for the week.
From the left hand side of the spread.

Top of the right hand side of the week.

The three cards from the middle of the right hand page.

Project Life - June monthly summary

For the monthly insert for June, I used, as I did in May, one quote card, which was a free
download and printable offline, as was the journalling card I used. Some months I tell a more
indepth story, sometimes its more a point by point thing, it just goes with whatever I am
in the mood to share, or based on how much or little I documented on each weeks spread.

I have to be honest, this back side of June was a bit of a disappointment. I know I had collected
many pamphlets etc for the month, but as I was searching for them, I just couldn't recall where
it was that I put them, which is not surprising at all, so I had to go online, and print out what
info I could find on the places we had visited this month. The only thing I could find that I
actually had grabbed was the business card from the Hazelnut store out in Harrison.

I'm sure the originals will show up eventually, and when they do, I will add them to the insert.

Project Life - May monthly summary

Each month I do a monthly summary page in my Project Life album, using the 6x12 insert from
Becky Higgins. I also use the 6x12 coordinating patterned paper for the Clementine Edition.
One the front side of the page, I add my journaling and sometimes a quote card, as I did here.

On the flip side, I usually add momentos or memorabilia that I've collected over
the month, anything from receipts, pamphlets, to skytrain tickets, or starbucks cards.
I usually just paper clip these into place, so that in the future, should anyone want to
look at all these, it will be easy to take out and put back into place.

Monday, November 19, 2012

Project Life - Back page


Used the monthly cards for show that this first album covered the first
six months of this year, and I am so proud of myself that I have stuck with
this project each week, documenting life, the ups and downs, and did
it with pride, no judgement nor hesitations as far as sharing our lives.


Project Life - Week 26

This week is full, I mean to extra insert full. It's also
the end of the month, and a 2 day road trip, so there
is so much happening here.

The above picture, is the left hand side, with the first side of the first insert
showing, Lots and lots of journaling this week, especially since we did so
much exploring and day trips. 

A busy start to the week is highlighted in this spread, and once again used
photo collages to maximize the amount of photos I was able to use, I also
added journaling to the one photo, since I was running out of room for any
more journaling on the cards. Family was the theme this week for sure. 

The first insert is of the two days we were on our road trip, and all the photos
we captured along the way. I tried to include a little text on each photo to
record the location, and meaning of the photo. This was day one's photos.

The above photo shows the back side of the first insert and the front side
of the second insert, which help pamplets etc from the trip.

A close up of day two's photos, and more text on photos.

We picked up lots of bits and pieces along our journey, and I managed to
include alot of it between the front and back of the second insert page.

This is the last spread of the week, including more journaling cards, which
I will post along with the others at the bottom of this post.

A close up of the back page of the second insert. Maps, postcards
and some pamphlets from the places we visited.

This last page is actually a continuation of the first page, as it tells the
rest of the story of the week, before leaving to go on our last minute, lets
get out of town for the weekend, road trip. Also, once again, more text
added to the photos.
Here's all the journaling cards I did from the first and last pages of the week.
I hope this makes them easier to read, and share in our stories. I am starting
to add a little more personality to my cards with a bit of stamping.

Project Life - Week 25

This was a busy family week as well, but with some down time for
Tim and I to have a full adventure exploring  and photographing
new and different places. Because of this great day trip, I had to
use another of the project life inserts as an add on for the week.

The left side is another 6x6 insert and I used some of the fun frames that
are in one of my Iphone apps, called Instaframe, and then saved the photo
collages and printed them out in 5x5 prints. I like the balance between the
left side being in black and white and the other in color.

This side was about the things that happened around the house this week,
which started off on Sunday with Amy getting her hair cut, and it
being Father's Day, in which we all enjoyed Chinese Food from across
the street, so easy with the mall over there, to the building of the shoe
niche in the garage...and a little bit of geocaching as well.

This is the first side of the insert that showcases all we did in one fun filled,
driving day trip of pretty much the lower mainland..well maybe not all, but
a lot of ground was covered that day. Love the photos of Tim and I in the
bottom right hand corner, we both have that, don't take my picture look.

A close up the journaling cards I did for the insert, for the adventure we
had that day...and what a day it was...love days like this spent with him.

The look of the second half of the spread, back side of the insert, and
the right hand side of the week. Love how all the photos and journaling
cards on the last page go so well together. Also, added more texts to the
photos to increase the story telling room. The journaling cards are at
the bottom of this post if you'd like to read them more clearly.

Back side of the insert, some of my favorite photos from today's adventure.

Documenting my 1000 photo posted on IG,  Jordyn getting a new Iphone,
Amy's hospital visits, and just telling the weeks story.