Showing posts with label California Vacation. Show all posts

Monday, February 11, 2013

Beach Mini Album - Finished Pages

Here's a page by page look at the finished album. I hope
you enjoy looking at it as much as I did making it. Cheers!

You can see how inking the edges of each letter, helps it stand out
from the one below it, giving it a bit more dimension. And I just love
adding tons of ribbons to my rings on a mini album. 

A closer look at the front of the B. The title of the album is
So Cal Beach Visits. We visited 8 different beaches on our
last trip down, thanks to our great friend Mike. He lives in Long Beach,
we then went south to Seal, Huntington, Newport and Laguna Beaches.
Then north, to Santa Monica, Malibu, then on our way back south, a
detour into Venice Beach. So much fun seeing all the different beaches,
and piers, or shops that distinguish one from another. 

The inside with the first transparency insert. 

The back side of the transparency and the front of the E.

The insert has a bit of side detail to it. Unfortunately, I don't remember
which company made the transparencies I used in this album, Sorry friends.

Backside of the E and the rest of the album.

A close up of the backside of the E.

The front side of the A.  A close up look.

The next pages,  a full view. And another transparency overlay
to add much needed space for the journaling. I used mini letter
stickers for this. And had to mix sizes once I got down in the
letter availability. Why is there never enough of the letters
you need????

The backside of the A. I just had fun using the sticker sheet
from the Sweetdays line from Echo Park Paper Co. The few word
stickers are from the Authentic Line of word stickers.

A close up of the front of the transparency overlay.

The back side of the transparency overlay, more stickers used here.

The front side of the letter C. I used some of my favorite photos
from our visit to the three southern beaches we visited.

The backside of the C, I used a variety of elements here, I love
the cloud paper, and although the white letter stickers blended in
to the paper, I felt there was still enough of a contrast to stand out.
This was also a place to add a highlight photo from each of
the beaches listed that we visited this day. More letter stickers
from the Authentic Line of products. I just love their alpha
stickers and word stickers. Awesome color choices too.

The full look at the back of the C and front of the H.

The last transparency overlay, with more mini stickers as the journaling.

The backside of this last transparency, used more of the matching
stickers from this line of paper.
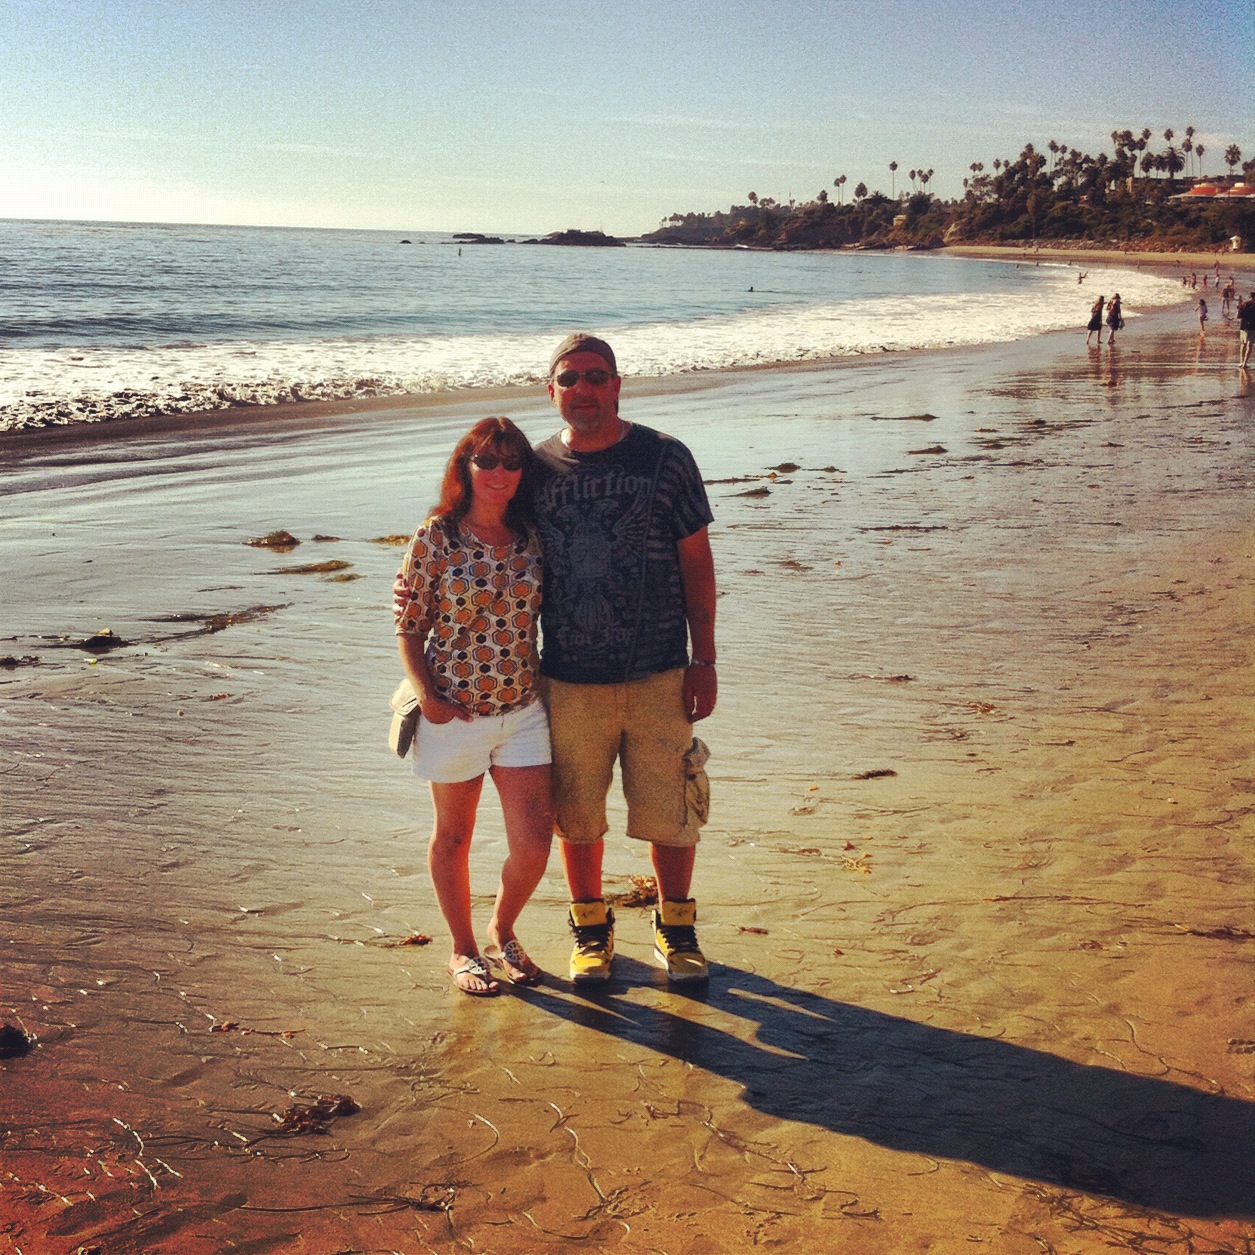
The close up view of some of our favorite memories from the northern
beaches we visited. It was mid October and the temperatures were
still in the low 90's. Oh how I wish I was back there today,

The last full spread of the album, the back of the H, and
the full piece of chipboard with the album. I wasn't going to
use it, but then decided it was extra space to add some
fun details, and a few more pictures
 
The backside of the H, just had fun with the sticker sheet, and played

The last page of the album dedicated to our wonderful friend Mike,
who made all these beach visits possible. Love this guy.

A look at the back side of the completed album

Thank you so much friends, for taking the time to look at my album, and let me share some memories with you all.

Beach Mini Album - Covering the chipboard

I got this Bo Bunny Beach chipboard album on sale at my local
scrapbooking store for only $2 and decided to use it for our
last visit to California, in Oct of 2012 I also had on hand
wonderful, happy pattern paper and stickers from Echo Park
 and the line is called Sweet Day. Perfect for a beach theme

The most challenging part of any chipboard album is getting it
covered, whether with patterned paper, fabric or by just
inking it to get the colors you desire. For me, I have always
loved covering them in paper, love using a line of products
that all go together, so the album flows nicely.

The process begins with lining up the patterned paper,
I try to get a least one side perfectly placed along the edge,
to save me having to cut that side, then  I trace around the
letter and full chipboard piece, making sure to trace it on the
side I want facing up, and that the pattern or design of
the paper will also be in the right direction when adhered.
 
Make sure you cut a piece of patterned paper for both the
front and back of each letter, I like using double sided
paper for this as it will give you one side for each side
of the letter. (make sure you trace it out with the right
side showing that you want, or you will end up with both
sides looking the same. I make a note on each side of the
chipboard, saying front and back, just so I don't confuse
myself or the paper I cut out, Certain letter, will look very
similar when flipped over. A mistake I've made in the past,

Just showing you how I line up the one edge of the letter
to maximize paper usage and to save on cutting one side
of the paper. Also, remember to trace out circles for the
rings, and then you can use a hole punch to get the holes
easier before adhering the paper to the chipboard.

Showing you the backside of the letter C,  and checking
the size I have cut, before the gluing process begins.
Oh, one thing I forgot to mention, is that I cut these
out by hand, with a pair of fine tipped scissors, and  a
paper trimmer for the longer, straight edges. I do not use
an exacto knife, as I find I have less control with one.
Please use whichever method of cutting that works
best for you. I do test run each piece of paper on the
chipboard to make sure I don't have excess overhang.

A look at how the tracing looks after moving the chipboard
piece, and before I start cutting.  This would be where I would
use the paper trimmer for the long straight cut, and then
hand cut the rest of the letter out. This is the front side
of the letter A, and I will once again use the same paper,
but opposite corresponding side for the backside of the A.
 
The back side of the same piece of patterned paper, and
ready to cut out for the back of the A.

As I go along, I line up the letters, to make sure I like
how the pattern papers are looking together, and if need
be make any changes before I actually glue anything
together. Easier to make those changes now, then
after everything is glued together.

When all the paper is cut out to size, now comes the part
that is my least favorite, and that's the gluing. It's messy, and
time consuming, and yet, I find using a glue stick just works
the best, over any double sided tape, as I have tried that
in the past. If you use a spray adhesive, I'm sure that
would work great, I've just never tried it before. And be
generous with the glue, get every little spot, especially all
the edges, and be careful with excess glue getting on the
good side of the paper, as I had a few areas I had to clean
off and it was a bit tricky to do so.  I found that putting
the glue on the chipboard itself, was less messy then if
applying it directly to the paper.

Hopefully you have a brayer, one of the best $15 I have spent
on scrapbooking tools, and it helps press down the paper
nicely, with no ripples or bubbling. Although, please be
careful in your lining up of the paper when laying it onto
the chipboard, as it does get a bit difficult to move if it's
off sided at all. I had more success lining it up from the
side with the holes and working my way down to the
end of the letter. I did have to trim away some excess, but
that is normal when tracing chipboard. 
 
The front sides are all adhered and ready for some sanding and
inking of the edges. I find that by doing this, any overhanging
paper gets worn away with the sandpaper, and the inking, I used
chocolate brown, just helps define each letter in the album,
and gives it a bit more dimension for the one below it,

The back side of the letters had much more color
difference, but that is how I chose to use the paper
it had. If you are using double sided paper, and it's
from the same line, you can mix it up as you feel works
best for your album.


I hope this will help you if you decide to make your own mini chipboard album,  and that you enjoy the process as much as I did. From start to finish, the covering of the chipboard took about an hour, give or take. And although it is a bit of a
hassle, once it is covered, you are on to the fun part of making the album a story to share with loved ones.

Sunday, October 28, 2012

A picture for every beach we visited

On our latest visit to Long Beach, California,
we were lucky enough to have our friend Mike
available to keep us busy for the entire week
we were down there, and also meant I had our
own personal photographer, to snap a photo of
Tim and I at each beach we visited. And yes, 
Tim even allowed all these photos to be taken.
Oh the magic of being on a beautiful, warm,
sunny beach. What a blessing to be able to
visit such amazing places with a wonderful
husband by my side, and a great friend to
enjoy the journey and exploration with us.


 Tim and I at the first beach we visited on Sunday,
This was in the late afternoon, and was at the
pier on Seal Beach, in southern California.


On Monday, we drove down the coast a little bit, and 
had a wonderful visit on both Huntington Beach, it's pier
and main town street, and then down a bit further to
Laguna Beach, which was the southern most point we
ventured on this or any trip we've had yet to California.


One thing I noticed during our beach visits was the different
feel of the sand beneath my feet and between my toes.
The photo above was Laguna Beach and it's texture
was almost glass like if that makes sense, more granular, 
but still soft, where as Huntington beach is so soft and warm.


On Tuesday, as we neared the later part of the
afternoon we ventured down to the beach in our
host town of Long Beach and enjoyed a casual
walk along the shore as the sun started to set.
Even at this hour, the temperatures were still 
comfortably in the high 80's and made for an 
enjoyable walk and photo taking experience.


Both the photo above and below were taken on the
beach on Wednesday when we visited the pier
in Santa Monica, which is north of Long Beach.
This top photo was the only one not taken by our
friend, but by a lady on the beach, who had no idea 
how to use an Iphone camera, imagine that :)


Notice in the above photo, that Tim's actually holding his
shoes and not wearing them. It's a big deal really, as he
never, ever walks in the ocean waters as it usually makes
his legs break out in hives, but this visit he had the urge
to put his feet in the crashing waves and had no ill
effects from the experience, yay for that!


The top photo was also from Wednesday as
we were lucky enough to have the chance to go a
bit further north up to Malibu, and we had a great
walk along the beach, watching the many surfer's. 
the different kinds of seabirds, and searched for
shells and rocks along the shoreline. This is the only
beach in which we actually beach combed and left
with a handfull of shells, rocks and seaglass.


This last photo was from the end of the day, as
we ventured back south towards Long Beach,
we asked for just one more stop, and that was
Venice Beach, and although we only spent a
short time there as the sun was starting to 
set, we truly felt blessed to have been able
to experience all three wonderful beaches in
one glorious day of fun and adventure.

How can you not want to stay in southern California,
to bury your toes in the warm sand, bask in the glow
of the setting sun, and know that you are doing this in
the company of your soulmate, your better half, the
person who's only footprints matter beside yours in
the sand as you walk along. 

Getting some creative mojo flowing today

I have had this 7gypsies painter's tray  for a while now, 
and I love their sticker sheets, so I knew that I wanted
to use it for our latest vacation photos from California.


After deciding which photos I wanted to use, then
figuring out the right sizing, and printing them out, I
managed to put it together in a few hours, and am quite
happy with how it turned out.


This is a close up look of it standing up on the
table, and the lighting was a bit too harsh, but 
I wanted to show how I placed some of the stickers
so that they are hanging over the sides of the tray.


A few years ago, when Tim and I took the girls
to Long Beach, California for our first real
holiday, I came home and did a painter's tray
as well, so I placed this current one beside
it on the wall in our dining room. I love
how my ladder hanging on the wall, offers
a great display space for things that make
my heart happy.


Tuesday, October 23, 2012

Love etching in the sand


I have always loved etching hearts in the wet sand whenever
I've walked the beach, from a teenager on. Maybe it's 
because I've been blessed with the best husband in
the world, and feel that love best expresses what
I am most blessed with in this life of mine. This photo
was taken on our California vacation this past week,
and the evening sun  hit the wet sand so perfectly that
this photo just glows and has so much feeling to it.

I will share more of our vacation photos and memories in
the coming weeks, but for now, just bask in the warmth this
photo evokes. And may you all be blessed with love in
your lives, whether in a soul mate, a child or a loving
mother or father. 

Below is the same etching but at a lower angle, and
the sun has set a bit lower in the sky. Love the colors
in this one, the shadows, the feeling, and the warmth.


Thursday, March 15, 2012

More vacation LO's

I managed to finish up a few more LO's
about our past visit to Long Beach and
Las Vegas, from last July none the less.

This LO below is just a fun one I did
showcasing my first food truck dinner
experience. I so loved the variety, and
I even kept the stick my ice cream came
on to include on my LO.


The LO below is a 2 page on I did of our
visit up to the new bridge spanning the river
between Nevada and Arizona, up at the
Hoover Dam. Our friend Mike and I ventured
up to check it out, while his wife Andy and my
hubby Tim stayed below, being chickens about
heights and all. We did manage to coax them
up for a looksy, but not too close to the edge.


This was from our first day in Long Beach, the start
of the days there are always foggy, due to the harbour
mist, so we ventured out to a local place that our friends
really like, called Portuguese Cove, and enjoyed
a exploring adventure and some minimal rock climbing.