I've been following Ali Edwards for years, watching her family grow through her wonderful scrapbook pages first in Creating Keepsakes magazine, then her blog and even now, on facebook and twitter. There is just something about her style, her way of bringing her story together that captures my full attention. I had no intentions of even trying this project this year, as most of us, I am busy and didn't believe I had the time to spend both in capturing our week on film, nor the documenting our days in so much detail. But as I watched her blog throughout her week and so many others going about bringing their week in the life together, I started to feel the tug to try it myself. I started half way through the week that most others were doing so my week was the last few days of July and the beginning few days of Aug. I also made some mistakes along the way, forgetting to document some times, and mixing up my picture uploading in the first few days then having to sort it all out in the end. All in all, it was a wonderful experience and I am looking forward to trying it again. So thank you to on of my favorite scrapbookers of all time and for your continue inspiration in my own life and creative endevors.
 the album I used was a 8x8 album, plain chipboard covered
from Stampin Up, and I covered it with a wonderful line of paper that
I had just purchasde weeks before the start of this album.

The top view of the album to show how I divided up
the album.

I was consistant throughout the album and only used
this line of paper along with the journalling cards that
went with the paper line. The title was black cs cut with my
cricut cartride, on of my newer toys I've been learning.

The left side of these two pages was actually the backside
of the title page paper and was all random bits and saying,
I added quite a bit of stamped images and sayings, using
color ink that closely matched the colors in the paper.

I loved this section of the paper when I bought it, and
knew it would do well for the table of contents page.
I did more stamping on this page as well.

When I had all my pictures organized, I used the
Photosheet program and did up 8x8 collages and had
printed out at Costco for only $1.89 each, which was a
good reasonable cost :)
Each day had the same LO, fun stuff on the left side,
a small hand made journalling card, in which I actually
hand wrote all my photo references (a rarity for me to use
my chicken scratch on a LO) then the right hand side was
the collage, with a 4x6 photo sheet attached with brads to
add a bit more photos and on the backside either more
journalling or reciepts or other goodies.

a closer look at the elements for the first day, just
to give you an idea of how each day was done.
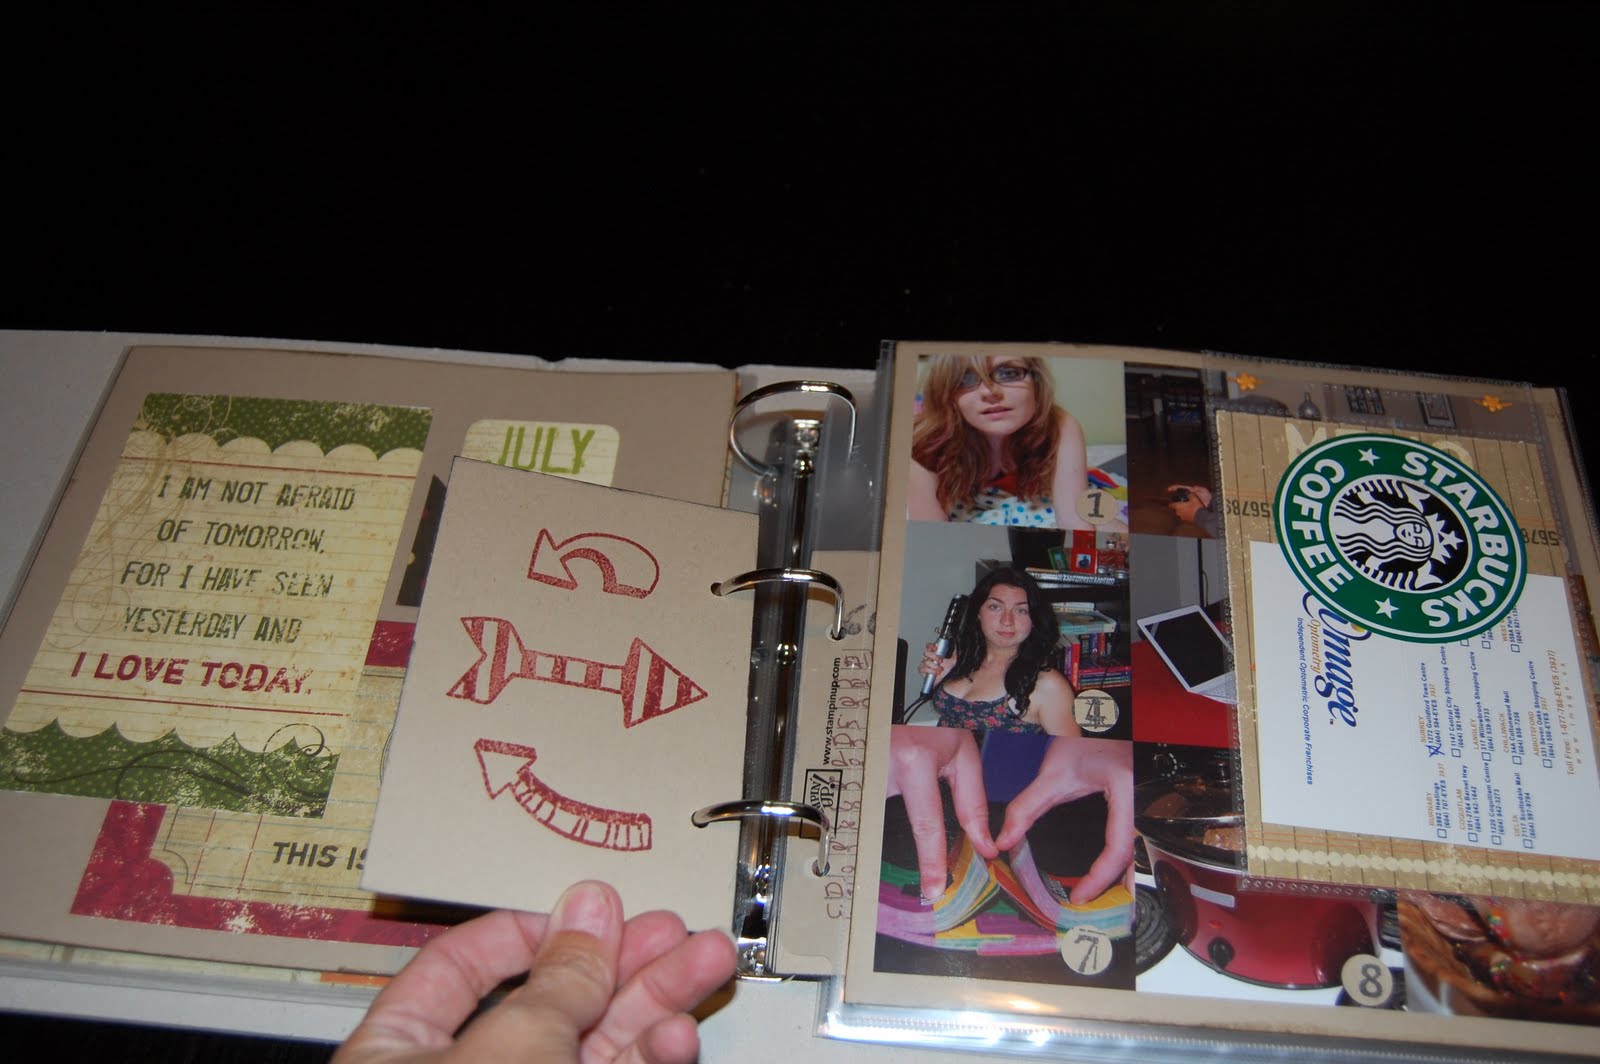 the back of each journalling card look so bare that
I just decided to add some fun arrows to direct
the flow of the album :)
 A look at how I numbered the photos
so that they would correspond with the hand
written notes I made.
 Day 2, same format.
 This day, I didn't take enough photos, so only
had ones from a walk along Crescent beach so
I used all of those, but Amy and I did have
gelato at a quaint little place, so I saved the
business card and our spoons to use :)
 Day 3
Day 3 Just a few tidbits from our day, not much
but something at least.
 This was one of my favorite days of the week,
time with my friend Cathy and her two girls,
then time with my brother in law learning
how to fire a gun, and shooting for hours.
And ending the day finding pop shoppe pop.
I saved both the bottle caps for the LO, and the
bottles sit on my window sill with flowers in them.
 I didn't have much for tidbits from this day,
so I just used our treat receipt from McDonalds.
 Oh, and on the front of each 4x6 photo, I added
 I only did a few days of full journalling cards on
 I loved that I had a new month during this week,
 A little journalling card and the tag from a pineapple.
 Not much happening this day, just errands, so
 Apple store business card and receipts.
 I made my own day sheets and actually
 A little journalling for the end of the album, and
 I took this photo while flipping through the day
Thank you for taking the time to look at my week in the life
 Oh, and on the front of each 4x6 photo, I added
a small journalling stripe as well.
 I only did a few days of full journalling cards on
 the back of the 4x6 photo.
 I loved that I had a new month during this week,
because I really liked the month cards of this set,
but only August had the right colors that I wanted.
This was also another of my favorite days, BC Day
holiday and Jason and Michelle for a BBQ and a
night of game play out on the deck on a warm evening.
 A little journalling card and the tag from a pineapple.
 Not much happening this day, just errands, so
most of the photos were taken on my iphone
during our outings.
 Apple store business card and receipts.
Good thing for warrenties.
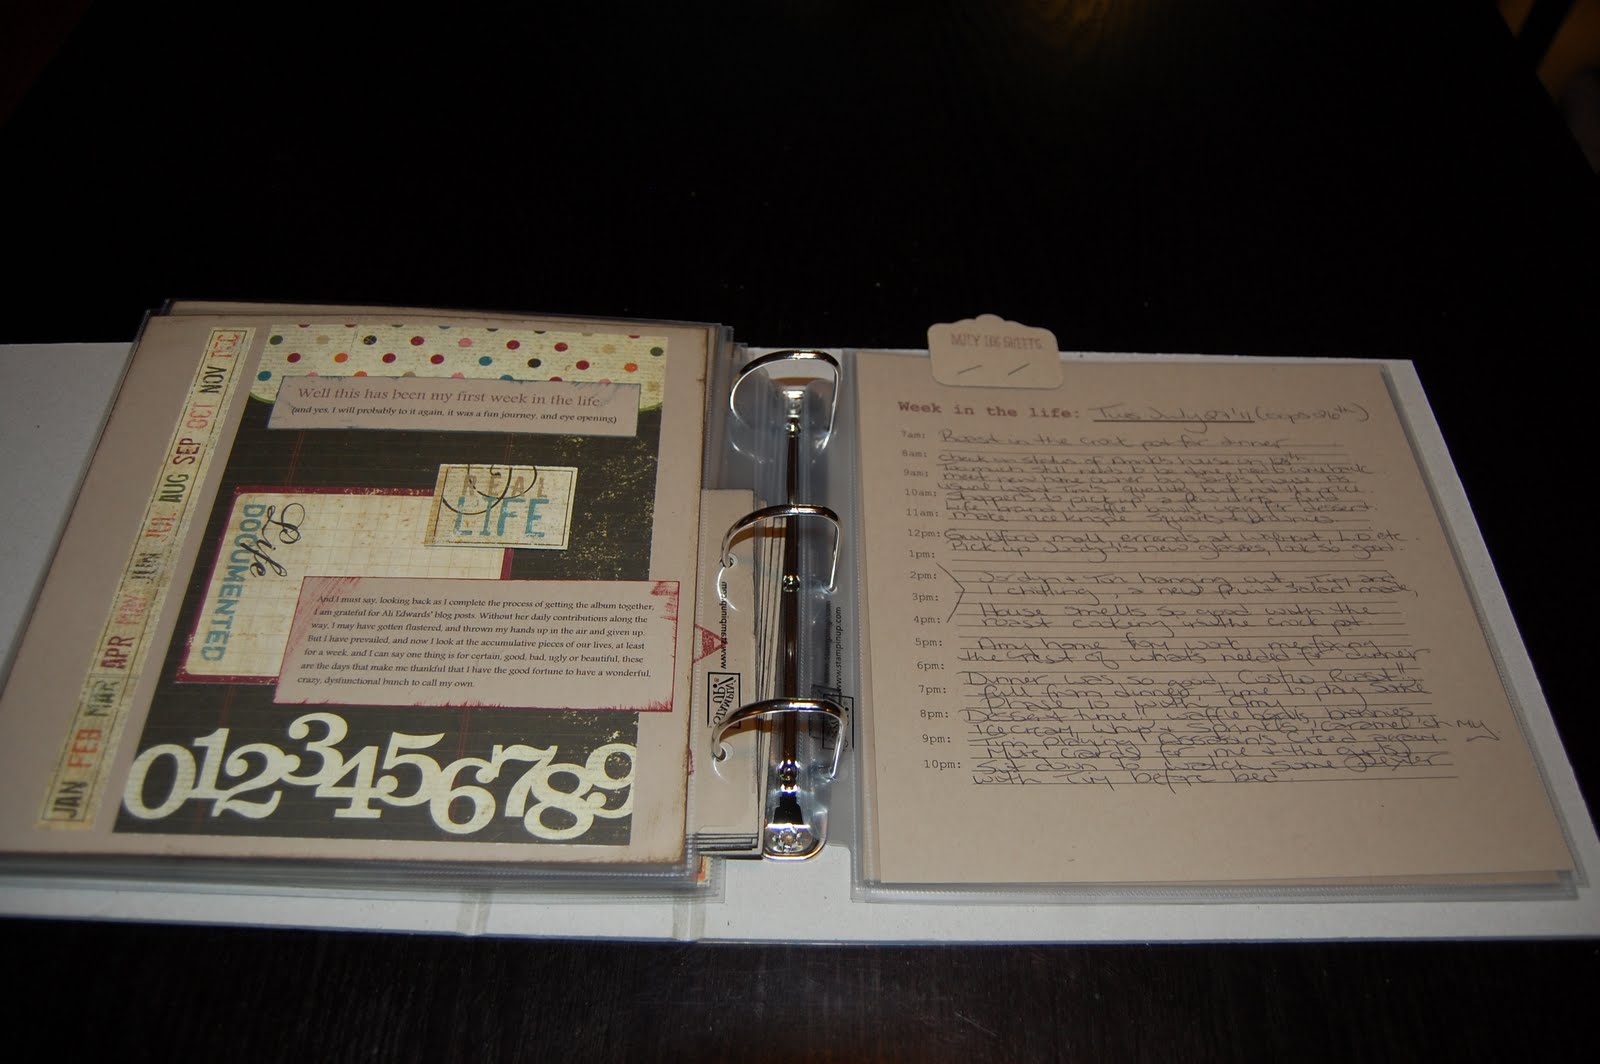 I made my own day sheets and actually
handwrote again on each one, although my
instinct was to type it for more clean lines,
I had Ali's voice in my head telling me there
are no mistakes in scrapbooking and to embrace
my handwriting, for future generations.
 A little journalling for the end of the album, and
to just have a nice clean end before the addition
of all the days sheets.
 I took this photo while flipping through the day
sheets just to give you an idea of how they looked.
Thank you for taking the time to look at my week in the life
project, any comments would be appreciated.


